
Incorrect mulch installation causes direct, measurable damage to plants, trees, and soil health — and most homeowners are making at least one of these five mistakes without knowing it.
Mulch is one of the most widely used materials in residential and commercial landscaping. Organic mulch types — including shredded hardwood bark, wood chips, pine straw, and cedar mulch — suppress weeds, regulate soil temperature, and slow moisture evaporation from the root zone. But the benefit only holds when installation is done correctly. When it is not, the same material that protects plants can suffocate roots, spread fungal disease, and invite structural damage to trees.
The following five mistakes are the most common, the most damaging, and the most preventable.
Mistake 1: Volcano Mulching Around Tree Trunks
Volcano mulching is the practice of piling mulch directly against and up a tree trunk, creating a cone or mound shape. It is the single most widespread mulch installation error in residential landscaping, and it causes lasting damage to trees of every species.
When mulch contacts tree bark, it traps moisture against the cambium layer — the thin tissue just beneath the bark responsible for transporting water and nutrients. Sustained moisture contact breaks down the bark, creating entry points for fungal pathogens including Phytophthora and Armillaria root rot. The International Society of Arboriculture (ISA) identifies volcano mulching as a leading preventable cause of premature tree decline.
Beyond disease, mounded mulch creates nesting conditions for rodents including voles and mice, which gnaw on bark at the base of the trunk. Bark girdling, where the cambium layer is chewed in a full ring around the trunk, can kill a mature tree within a single season.
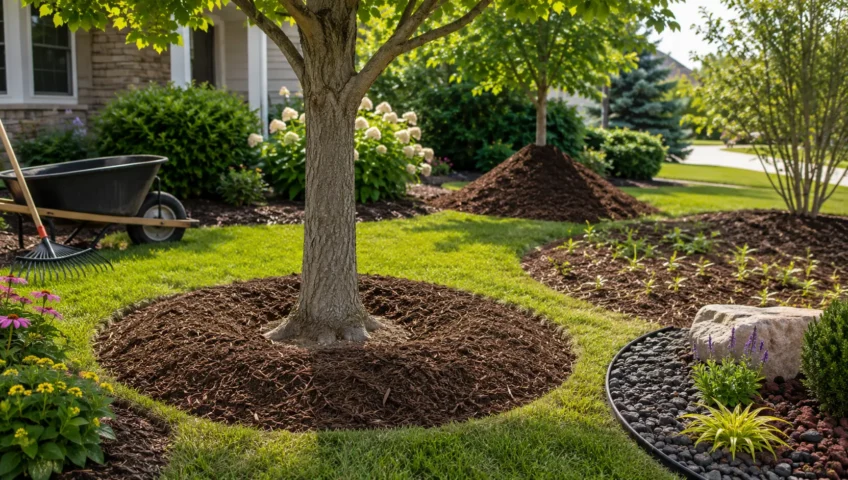
The correct method: Apply mulch in a flat, donut-shaped ring extending outward from the tree’s drip line. Maintain a clear gap of 2 to 3 inches between the mulch edge and the trunk base. The root flare, where the trunk widens at soil level, should always be visible.
Mistake 2: Applying Too Much Mulch
More mulch is not better. Layers exceeding 3 inches in depth create a cascading set of problems at the soil and root level that directly undermine plant health.
Thick mulch layers restrict gas exchange between soil and atmosphere. Plant roots require oxygen for respiration, and soil organisms including earthworms and beneficial bacteria require aerobic conditions to function. A mulch layer above 4 inches compresses over time and becomes hydrophobic, meaning water beads on the surface and runs off rather than penetrating to the root zone. This causes drought stress in the very plants the mulch was meant to protect.
Excessive mulch depth also creates an environment where secondary root growth migrates upward into the mulch rather than downward into the soil. These shallow roots dry out rapidly during warm weather and leave the plant structurally vulnerable.
According to research from the University of Florida IFAS Extension, mulch depth between 2 and 3 inches provides the optimal balance of moisture retention, weed suppression, and root zone oxygenation for most landscape plants.
The correct method: Apply no more than 2 to 3 inches of mulch across planting beds. Use a rake to distribute evenly. If old mulch is already present, measure the combined depth before adding a new layer. If existing mulch is still intact and above 1.5 inches, raking and fluffing is sufficient — do not top up to the full 3 inches.
Mistake 3: Skipping Bed Preparation Before Mulching
Placing mulch over unprepared ground is one of the most overlooked but costly errors in mulch installation. It does not suppress existing weeds — it shelters them.
Weeds already rooted in soil continue growing beneath a fresh mulch layer, using the added warmth and moisture retention to accelerate growth. Annual weeds including crabgrass and chickweed send seeds upward through mulch layers up to 2 inches thick. Perennial weeds with established root systems, such as bindweed and nutsedge, push through even thicker layers with ease.
Beyond weed control, skipping bed preparation means mulch is laid over compacted soil, existing debris, and in some cases active fungal growth from decomposing plant matter. These conditions reduce the mulch’s effectiveness and can introduce disease directly into the planting bed.
The correct method: Before any mulch is applied, remove all visible weeds by pulling them at the root. Do not cut weeds at soil level — severed root systems of perennial weeds will regrow. For large beds, lay a single layer of overlapping cardboard or newspaper directly on the soil surface before mulching. This biodegradable barrier blocks weed germination for one to two seasons while allowing water and air to pass through. Avoid landscape fabric in permanent planting beds, as it impedes soil biology and makes future planting difficult.
Edge the bed cleanly before mulching. A defined edge prevents mulch from migrating onto turf and keeps the installation looking maintained throughout the season.
Mistake 4: Using the Wrong Type of Mulch for the Application
Not all mulch types are interchangeable. Selecting the wrong mulch for a specific plant type, location, or soil condition reduces effectiveness and can actively harm the plants in that bed.
Inorganic mulches, including rubber mulch, river rock, and decorative stone, do not decompose and contribute no organic matter to the soil. They are appropriate for pathways, play areas, and non-planted zones. When used around trees and perennial plants, rock and stone absorb and radiate heat, raising soil temperatures above the threshold that damages fine feeder roots. Rubber mulch, derived from recycled tires, has been shown in studies from the University of Georgia to leach zinc and other compounds into the soil at levels that affect sensitive plant species.
Within organic mulches, the pH effect of the material matters. Pine straw and pine bark lower soil pH as they decompose, making them beneficial for acid-loving plants including azaleas, blueberries, hollies, and rhododendrons. Using pine-based mulch around plants that require neutral to alkaline soil, such as lavender or clematis, gradually acidifies the root zone and produces symptoms that resemble nutrient deficiency.
Fresh wood chip mulch from recently chipped green wood can temporarily draw nitrogen from the soil surface as the material begins decomposing. This nitrogen immobilization effect is short-term and occurs only at the soil-mulch interface, but it can affect shallow-rooted annuals and ground covers in the first few weeks after application.
The correct method: Use aged or composted shredded hardwood bark or wood chips as a general-purpose organic mulch for most planting beds. Use pine straw or pine bark specifically around acid-preferring plants. Reserve inorganic materials for hardscape zones and pathways. When unsure, consult the USDA Plant Hardiness Zone designation for your region and cross-reference with your county cooperative extension service for locally appropriate mulch recommendations.
Mistake 5: Failing to Refresh or Replace Mulch Seasonally
Mulch is not a permanent installation. Organic mulch decomposes continuously, breaking down into humus that improves soil structure and provides slow-release nutrients. This decomposition is a benefit, but it also means the material must be replenished to maintain protective depth and function.
Most organic mulches compact, fade, and thin down to under an inch of effective coverage within 12 to 18 months. At that depth, the material no longer suppresses weed germination effectively, no longer retains adequate soil moisture, and no longer provides meaningful insulation against soil temperature fluctuations. Old matted mulch can also form a dense, water-resistant crust that redirects rainfall away from the root zone rather than allowing it to infiltrate.
A separate issue occurs when mulch is left in place for multiple seasons without inspection. Layers of decomposing mulch beneath fresh top-ups can develop sour mulch, a condition caused by anaerobic decomposition that produces acetic acid, methanol, and hydrogen sulfide. These compounds lower soil pH sharply and can cause rapid wilting and leaf scorch in susceptible plants shortly after a heavy rain.
The correct method: Inspect mulch depth at the beginning of each growing season, typically in early spring. If depth has fallen below 1.5 inches, apply a fresh layer to bring it back to 2 to 3 inches. Before top-dressing, rake and aerate existing mulch to break up any compacted or matted areas. If sour mulch is suspected (identified by a vinegar or rotten-egg odor), spread it thinly and allow it to off-gas for 24 to 48 hours before spreading around plants, or remove and replace it entirely.
Quick-Reference Mulch Installation Checklist
| Apply This Practice | Avoid This Practice |
| Maintain 2 to 3 inches of depth | Layering 4 or more inches |
| Leave a 2 to 3 inch gap around tree trunks | Piling mulch against trunk bark |
| Pull weeds and prep beds before mulching | Mulching over existing weeds or debris |
| Use aged organic mulch in planting beds | Using rubber or rock mulch near trees or plants |
| Refresh mulch each spring | Leaving compacted mulch in place for multiple years |
| Match mulch type to plant pH requirements | Using pine mulch around pH-neutral or alkaline plants |
Why Getting Mulch Installation Right Matters
The cumulative effect of these five mistakes is significant. Volcano mulching combined with excessive depth can kill a mature tree over three to five years, with symptoms that appear as gradual decline rather than acute damage, making the cause easy to miss. Skipping bed preparation wastes both mulch and labor, as weed pressure returns within weeks.
Done correctly, a 2 to 3 inch layer of properly selected organic mulch applied over prepared soil reduces supplemental irrigation needs by up to 25 percent, suppresses the majority of annual weed seed germination, and contributes measurable organic matter to the soil over a two-year decomposition cycle.
Mulch installation is a low-cost, high-impact landscape practice. The difference between a healthy landscape and a damaged one often comes down to depth, distance from the trunk, and preparation of the ground beneath.
